If you’re new to SEO or don’t consider yourself a subject matter expert, you might have a visceral reaction to an intimidating phrase like “XML sitemap.”
However, there is no need to recoil. While these files are on the technical side of SEO, they’re not hard to understand or create. You don’t need to learn a whole new coding language or perform intricate tasks. All you have to do is acquire some basic knowledge and do a few mouse clicks.
Below, you can read everything you need to know about XML sitemaps and how they can boost your website’s SEO.
What Is an XML Sitemap?
In lamen’s terms, an XML sitemap is a guide to Google and other engines of the pages you want them to crawl and index.
When it comes to understanding “what is an XML sitemap,” you can think of it as a traditional map but for the online realm. It’s a map of all the pages on your website.
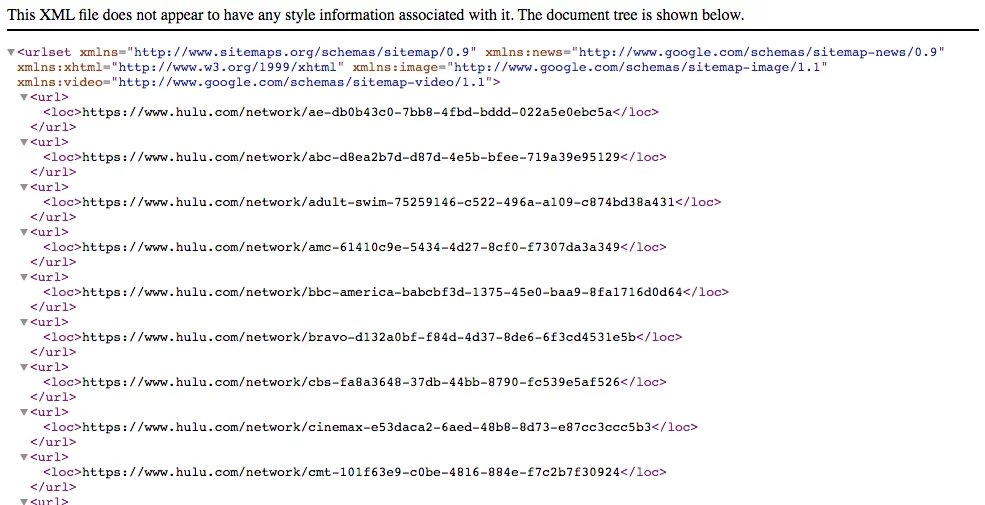
An XML sitemap is a list of a website’s URLs. It’s a blueprint for your website’s structure, as it details which pages your website contains.

Note: The XML portion stands for “extensible markup language,” which is a language that encodes documents so that both humans and machines can interpret them.
Take our website for example. Our XML sitemap on lseo.com would contain URLs like:
https://lseo.com/seo-services
https://lseo.com/seo-services/seo-consulting-services
https://lseo.com/paid-media
What Does an XML Sitemap Do?
Search engines use crawlers to catalog and index data on the internet. And no, these “crawlers” aren’t the creepy spiders or eerie bedbugs that plague your nightmares. The crawlers are software — we call them spiders because the name is quite fitting. They crawl and read all the information on a website and leave no area untouched, so they give off a type of an omnipresent vibe (just without the heebie-jeebies).
Crawlers are pretty advanced, as they can interpret all types of information. But why not make it easy for them? When you create an XML sitemap, you make it simple for crawlers to read what’s on your website and index it.
Once a crawler performs its job, you might notice your number of pages indexed on search engines like Google shoot up which could have a direct impact on your rankings as long as the search engines deem your pages worthy.
In summary, an XML sitemap acts as a table of contents for your site. It lets the crawlers obtain vital information and index your website accordingly.
However, a thoughtfully made list of URLs can do even more for your pages. It can get much more specific and tell Google and other search engines:
- The last time specific pages we updated.
- The priority level or how important a page is in comparison to the rest of the website.
- How to locate and index content buried deep within your website’s structure.
Are you curious as to how a list of URLs depicts all this information? Check out the notation below:
- A page’s location compared to other web pages: <loc>http://www.model.com/mypage</loc>
- How often a page is changed: <changefreq>monthly</changefreq>
- The date a page was last edited: <lastmod>2018-06-17</lastmod>
- How important a page is compared to other pages: <priority>1</priority>
What Are the Benefits of an XML Sitemap?
One of the main benefits of these files is the speed they offer. A list of URLs is a quick way to get Google to index your website’s pages.
This file is very straightforward — it screams from the rooftops, “Hey Google! Check out my web pages! These are the ones I want you to crawl and index!”
When you implement an XML sitemap, Google will crawl your website and index your pages within minutes as long as you don’t neglect your SEO. The pages still need to carry good on-site SEO practices to gain a significant ranking.
Some other significant benefits of a list of URLs to understand are that it:
- Tells Google a little bit more about your website and what kind of information your website contains.
- Informs Google that you are updating your content (search engines love hot-off-the-press content, as they often deem it more relevant).
- Combats the drawbacks to a website that has a lot of content and pages where some pages can get hidden in the architecture.
- Helps large websites achieve more thoughtful indexation.
What Should an XML Sitemap Include?
An XML sitemap should contain all of your valuable HTML landing pages. Let’s dive a little deeper.
Whether you’ve built your website from scratch or had a high-class team of developers work on it, you’re likely proud of it. It probably contains all the pages a business website should have, including a “Privacy Policy” page, a “Services” page, and everything in between.
If you’re a service-oriented company, you likely have dozens (if not hundreds) of pages dedicated to explaining your company’s worth plus supporting content pertaining to your services. Your pages will detail the areas you serve and the services your employees provide.
Wouldn’t you want all these pages to make it onto your list of URLs? As much of a no-brainer as this concept may seem, don’t be too quick to implement it.
Before you decide on the pages you want to include in your list of URLs, you should learn about the two main types of web pages:
Utility pages: Utility pages are like the mechanical parts of a car — they’re handy, but they aren’t the first things a user will notice. Some examples of a utility page could be an “About Us” page or a “Terms and Conditions” page. These pages contain essential information that your users will want to read. However, if a user’s first impression of your company or brand is a utility page, they’ll likely click off. A utility page is for further research (not an introduction for potential customers).
Landing pages: Landing pages are like a car’s beautiful exterior — think a stunning metallic or matte finish. You should design landing pages to accomplish a specific goal, like downloading a brochure, buying a product, or signing up for your company’s newsletter. While homepages can function as landing pages, it’s best to create as many specific landing pages as possible. Implementing a goal-oriented technique will help ramp up your conversions and deliver impressive results.
An XML sitemap aims to provide Google with a clear-cut message about the content of your web pages. If you send Google an overloaded list of URLs, it’ll become overwhelmed. The crawl budget (the number of pages Googlebot crawls and indexes within a certain timeframe) comes into play.
You need to conserve your crawl budget for pages that matter. While your “About Us’ type pages are important, let’s face it, they aren’t there to provide any value to Google nor will they carry any value in organic search.
Why Should I Only Include Landing Pages In an XML Sitemap?
Your landing pages are the meat of your online presence. When you design and craft them correctly, they will gain more traffic and influence those visitors to take action with your company.
You should only include landing pages in order to save your crawl budget for pages that carry organic value.
Google understands that every website has some “utility” pages that are important for users to read. Unfortunately, these utility pages aren’t that important to Google and other search engines and they prove lousy for organic search results as they don’t offer the ideal experience for users.
As you’re working with an XML sitemap generator or an XML sitemap validator, you’ll need to ensure your XML file lists only the pages you need to have in there.
I want to conclude this by saying that an XML sitemap isn’t the end all be all. This is one of two ways search engines can crawl your website. The first way is by coming to a page on your website and navigating your internal link structure. If they choose this way, they are going to find all of your pages, including utility pages. That is fine.
The second is your sitemap. To keep things concise and to make the crawling of the sitemap file more efficient, stick to your pages that matter. You can tell Google how to crawl your website, you just have to make sure that your sitemap is created and set up properly if it’s the latter.
How to Create an XML Sitemap
Creating an XML Sitemap via Generator
We’ve discussed the question of what is an XML sitemap and explained how it works, but now you may be wondering how to create an XML sitemap?
You can do so via one of two methods: automatic or manual creation.
Creating a list of URLs automatically is quite simple. All you have to do is plug your website’s link into an XML sitemap generator. Then, the generator will take some time (anywhere from several minutes to a few hours) to crawl your web pages. The speed at which a generator works will depend on how many web pages you have.
My preferred method is via the Screaming Frog Spider, but it’s a little more advanced to use than your typical generator. Screaming Frog will actually crawl your website

Once the XML sitemap generator does its job, you’ll be ready to push your sitemap live. This requires some web development knowledge so you may want to find a partner to add the file for your or seek your web development company’s help.
After that, you can add the URL of your sitemap to your Google Search Console account and your robots.txt file.
Will the chance to use a generator set you back a fortune? Not necessarily. Many websites host XML sitemap generators. They often let website owners use these tools for free, as long as their websites contain 500 or fewer pages. If you have more pages, you may have to pay to use a more advanced version of the tool.
Using a generator is a reliable way to create an XML sitemap. Many websites even allow you to do so with no registration process — all you have to do is plug in your URL and watch the scanning process commence.
If your website is built on WordPress or Shopify, you won’t have to do much at all. Shopify will automatically generate your sitemap and WordPress has many plugins that will handle this for you like Yoast and All in One SEO. This is ideal because these will dynamically update as you add new pages to your site.
Creating an XML Sitemap by Hand
While taking the easy way out with an XML sitemap generator is the easiest option, it’s not the only one at your disposal. The other way to create an XML sitemap is to take the manual route. To give you an overview of how this process works, you can read about these steps on how to create an XML sitemap by hand:
1) Know What to Look For
While an XML file is simply a list of pages on your website, you need to remember not to add pages liberally. Your list of URLs should only include pages that you want Google to index.
You can ditch the post-purchase “Thank You” page and the account “Log-in” page for your company. Instead, focus on pages that should be in Google’s index. If you have a more technical understanding of SEO, you can also ask, Does the page self-canonicalize? Does the page return a 200 status code? If the pages meet these criteria, you should consider adding them to your list of URLs.
2) Collect Your Pages
At this point, you should begin to collect the pages you want to include in your list of URLs. You can use an online crawler or perform what’s called a “human crawl.” To execute a human crawl, you’ll need to go through all of your web pages’ main navigation options and scroll down to their deepest level.
We recommend performing a human crawl for any small- to mid-sized website. The process isn’t too cumbersome and will give you a better idea of how user-friendly your online space is to visitors.
As you start collecting URLs, you can group them into several categories like Services/Products, Blogs, and General (like About Us and Contact Us pages).
This categorization will make it easier to create a well-organized list of URLs.
3) Code Your URLs
You will work in a text editor for this step. You can also use XML and save as an XML table.
Start by typing in your opening <urlset> tag and add all your URLs with the relevant <url> and <loc> tags. Once you’ve added all the URLs you wanted to, you can close the <urlset> tag with the command </urlset>.
4) Perform a Check
Whether you created your list of URLs with a generator or did so manually, you should always double-check your work. Taking this step will ensure you have a list of URLs optimized for Google and other search engines.
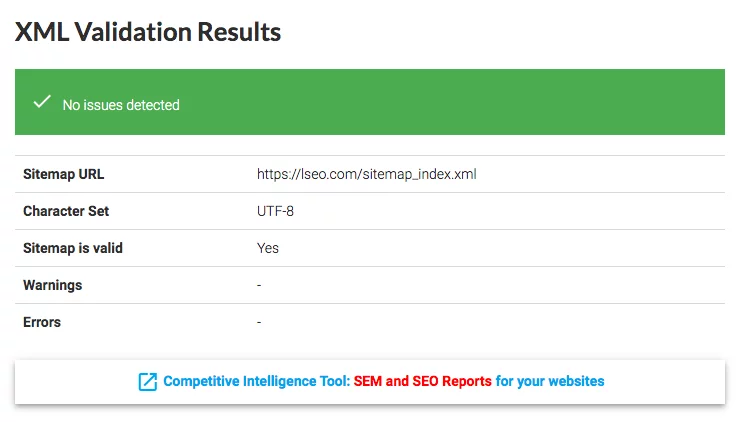
You can validate your creation using an XML sitemap checker (also called an XML sitemap validator).
Using an XML sitemap checker is pretty simple. Start by saving your file and naming it sitemap.xml. From there, you can visit an XML sitemap validator online. Many websites offer this service for free. Upload your file and pray that you see a message that says something along the lines of, “We’ve found this document to be well-formed XML.”

If your document has any errors, the checker won’t be shy about telling you. It will quote the line of text that holds the error, making it easy for you to go back into your text editor and locate it.
The errors a validator can point out can be as minute as a failure to open an end tag element. No mistake will go unnoticed, so using this tool is an excellent opportunity to perfect your website’s XML file.
5) Add the File Containing Your List of URLs to Your Root Folder
The next step is to add your XML file to your website’s root folder. You can do so locally, through a File Transfer Protocol (FTP), or have a developer take on the task.
When you (or a developer) completes this step, you can find your website’s list of URLs by visiting yourwebsite.com/sitemap.xml. The same is true for many popular websites — try it with Apple, and you’ll see a list of hundreds of pages.
6) Add Your List of URLs to the Robots(.txt) File
The robots.txt file is a fundamental text file. It contains instructions for the crawler that’s reading your website. The file resides in your root folder, so you can find it by visiting yourwebsite.com/robots.txt.
We recommend adding the following line to your robots.txt file to point the crawler in the right direction: “Sitemap: https://yourwebsite.com/sitemap.xml.”
Note: This step will only work if your website operates securely. It should use HTTPS rather than HTTP.
Submitting Your XML Sitemap
Whether you created your list of URLs manually or automatically, it’s time to submit it. The submission process will put your final product to good use.
Google and Bing are the most popular search engines in the world, but Google has quite the edge over Bing. In any case, you should, at the very least, submit your XML file to these top two search engines as well as have the file URL called in your Robots.txt file.
Submitting to Google
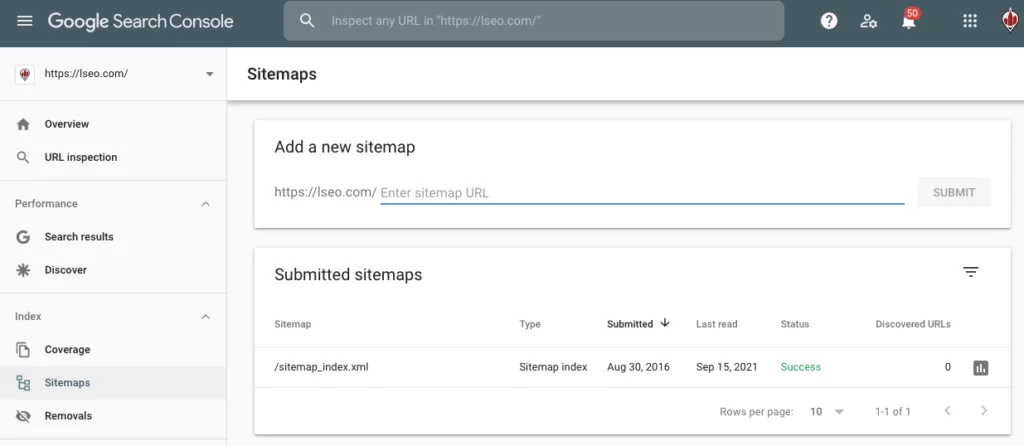
First, sign in to your Google Search Console (GSC) account. Then, click “Crawl.” Navigate to “Sitemaps” and select “Add/Test Sitemap.” Enter the phrase “sitemap.xml” or the slug you chose for your sitemap into the relevant field and submit your list of URLs.

Submitting to Bing
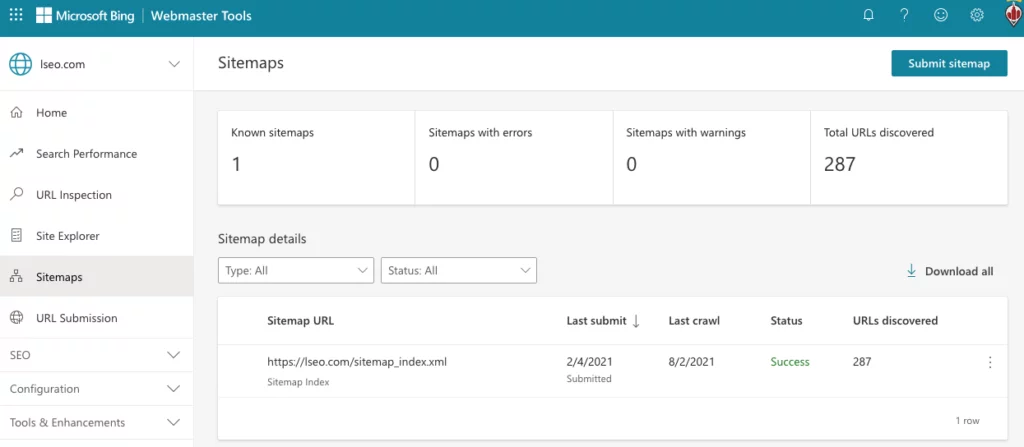
Submitting your list of URLs to Bing will involve a similar process. First, you must log in to your Bing Webmaster Tools (BWT) account. Then, click “Configure My Site” and select “Sitemaps.” Finally, enter your XML file’s full URL and click submit.
Once you submit your list of URLs to any search engine, you shouldn’t set it and forget it. Instead, attempt to check in periodically. Checking in will ensure search engines are crawling your URLs properly.
Sometimes, you may notice that a search engine is only crawling a handful of your URLs instead of all the ones you’d like it to check. If you notice a lack of activity, you can once again run your list of URLs through an XML sitemap validator to pinpoint issues.

Adding URL to Your Robots.txt File
You need to add your sitemap URL to your robots.txt file. Like there are two ways for Google to crawl your website, there are also two places for Google to find your sitemap file.
They can get it from Google Search Console or they can look at your Robot.txt file. Your robots.txt file is a list of instructions for search engines, or “robots.” Here you can put rules to disallow a search engine from going to certain areas or pages on your website. You can also point them to where your sitemap is located.
It’s simple. Go to the robots file and toward the bottom simply call your sitemap like this (obviously using your correct URL):
Sitemap: https://exampledomain.com/sitemap.xml

What Kind of Website Should Use an XML Website?
All websites should have a sitemap. There isn’t a reason not to unless your website is private and you don’t want to be found online. Otherwise, get one!
The chance to get discovered online is something that no business should leave on the table, no matter how big or small.
Do You Need Help Setting Up an XML Sitemap for Your Website? Reach Out Today!
Setting up a sitemap is something that anyone can learn to do. However, it will require some depth of knowledge to get it 100% right.
If you don’t want to dedicate your time or patience to learn this skill, you don’t have to. Instead, you recruit a digital marketing team like LSEO to set up an XML sitemap for your website. Reach out today for professional help so that you can focus on what you do best — running your business!


